Couture Snippets ~ Covering an ottoman

My photographer friend brought me this a LONG time ago to have it covered. She wanted it to use in her photography studio. It sat in my sewing room for so long the girls thought it was ours and were very disappointed when I got it finished and they found out we didn't get to keep it!

This is what it looks like now.
Below is a tutorial (sort of) showing how I made this slipcover.

Step #1. place top of stool on fabric and trace around it.

Step #2. cut out the circle. You can add a seam allowance if you want to. I don't always because if the fabric has any give to it at all it tends to come out too big and I wish I hadn't added the seam allowance. If you DO add the seam allowance and you decide the slipcover turns out too big you can always just take a bigger seam.

Step #3. measure around the stool...

...and measure the height of the stool. Cut out a piece of fabric the height of the stool plus enough for a hem and seam allowance x the measurement around the stool plus a seam allowance.

Step #4. Sew the large rectangle together.

You will have a tube. Press the seam allowance open

Step #5. Fold the round top piece in half and make small snips at the center on each side.

Fold in half again and mark the centers again with a small snip. This will give you 4 snips evenly spaced around the circle.

Step #6. Fold the rectangle piece in half with the seam to one side. Make a small snip at the edge opposite the seam. This marks the other side. Then fold in half again bringing the snip you just made even with the seam. Now make small snips on the opposite fold lines across from the You will now have 3 small snips and the seam evenly spaced on the rectangle piece.

(snip across from the seam)

Step #7. Pin the circle piece to the rectangle piece (that has been sewed into a tube)
You will match up those small snips.

When you are finished pinning it should look like this. Fits evenly all the way around with no stress and it is easy to make it happen when you mark your pieces with those little snips!
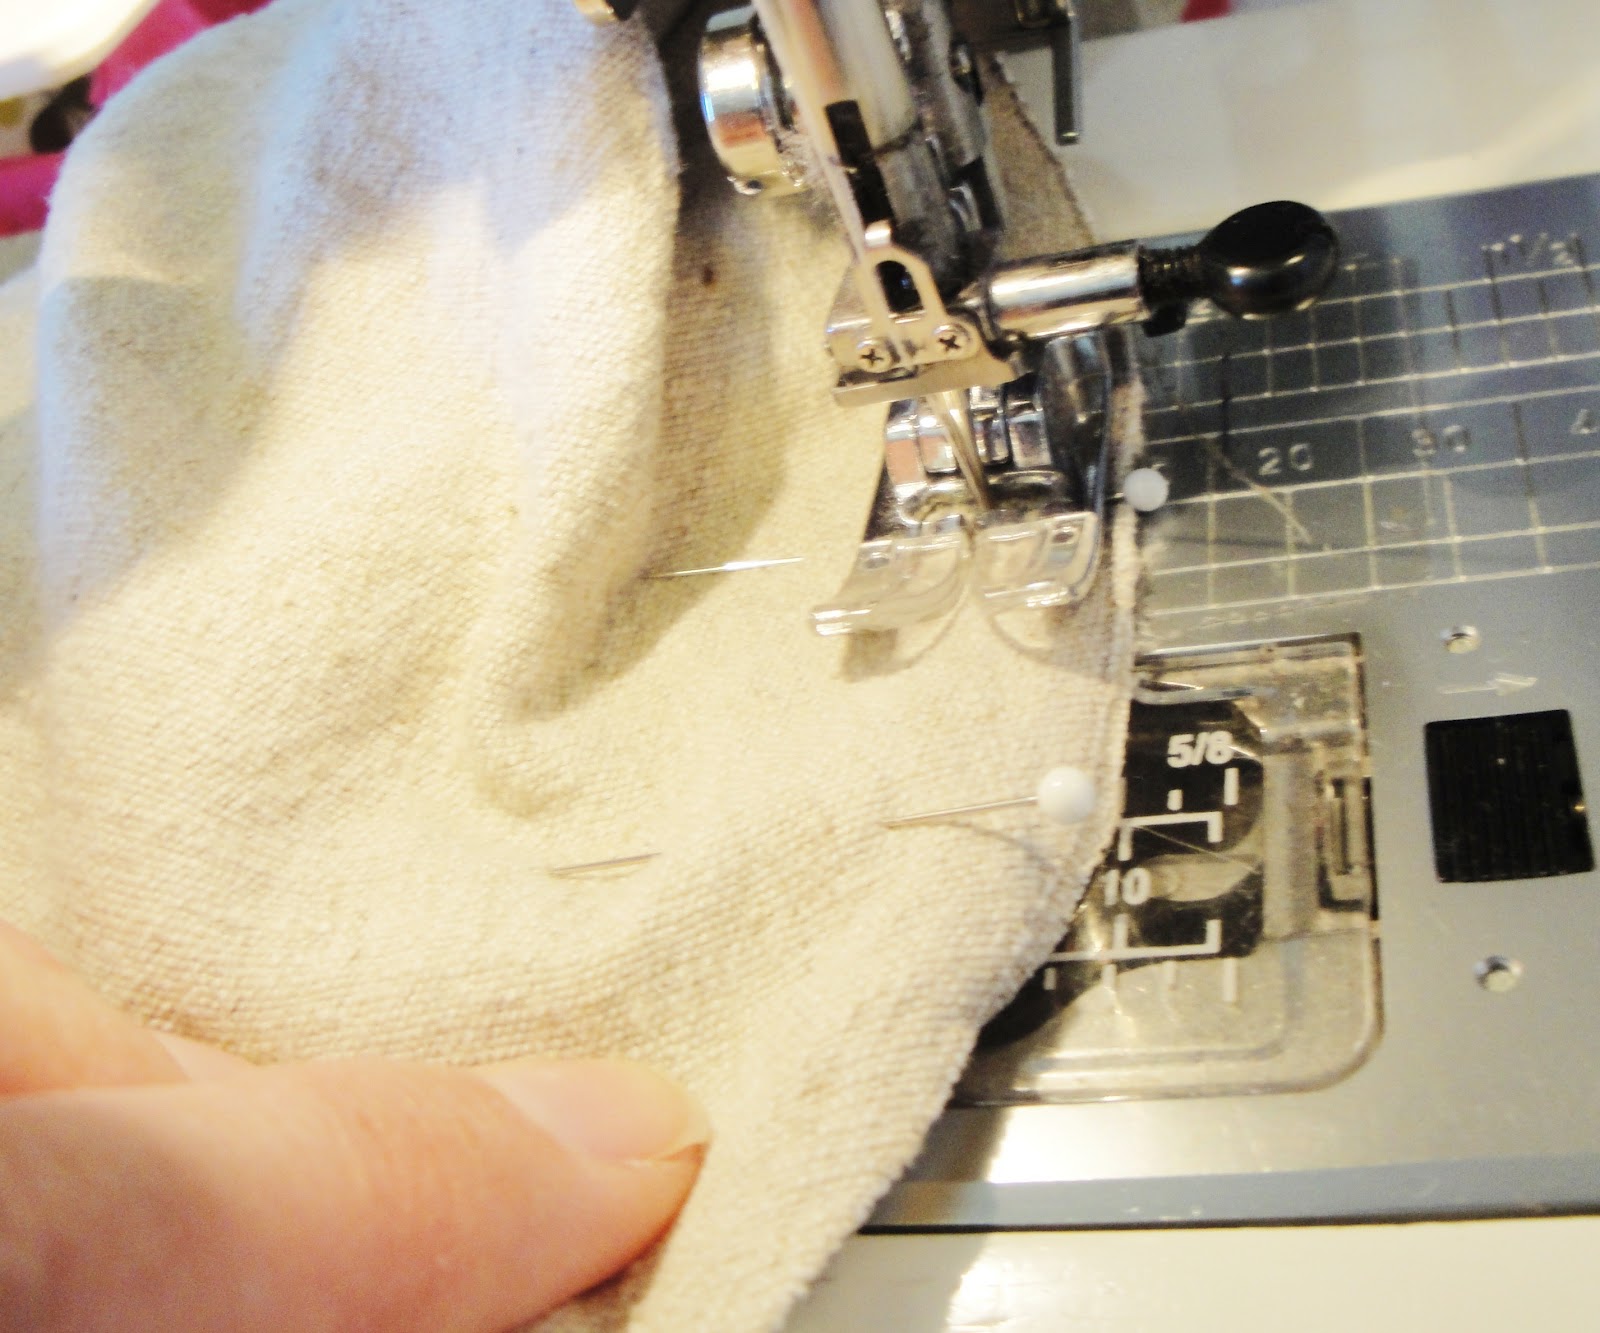
Step #8. Sew the seam you just pinned.

Step #9. Try it on for size. If you are happy with it at this point and this is the look you were going for, press that seam around the top well, pop the cover back on and viola!! you are finished!

If you would like to spiff up that cover a little, make it a little girly, a little foofy, or if you just love ruffles, continue on - I added a continuous ruffle to the whole thing.
1st step of the ruffle is to cut the strips. I measured them about 2 1/2 inches and made all my snips first, then tore the strips of fabric. I love a good raw edge :)

They will look like this and you will need a TON of them. Way more than you see in this photo :)

Step #2 of ruffle. Sew all those strips together. Since I was going for the raw edge look I turned the seam allowance out instead of in like you normally do with a sewn seam.

For the ruffling stage I used this wonderful little gadget. It is one of the best sewing investments I've made for awhile! I love it. It was around $40 I think and so, so, so worth it. If you like to make things with ruffles I highly recommend you get one. If you can't get one that works with your machine, I recommend a new sewing machine.

Step #3 of ruffle. Feed the beginning of the strip into ruffler.

See how cool this thing works? You can adjust it for how big each tuck is and how far apart for the ruffled look you want.

You will need a lot of ruffled up fabric for this project. I had to add more ruffled strips to mine halfway through because I didn't know how much it would take.

Step #4 of ruffle. After ruffling your strip start sewing it on. I just started at the bottom and went around. When I got around to where I started I just moved the ruffle up and went around again. Around and around and around and around and....

You can kind of see here where I started overlapping the ruffles when I got back to where I had started.

When I got to the top of the side piece I just continued onto the round top piece and went around and around to the center. Easy peasy!

It looked rather cute in my living room. I considered forgetting my friend wanted it for her studio and just leaving it in my living room. But then I thought better of it and took it to her!
So what do you think? Do you like the ruffly slipcover?
Do you think you could make one using my instructions or do I desperately need lessons in tutorial writing?
Labels: couture snippets, foot stool, ottoman, ruffles, slipcover
posted by Sew a Fine Seam at
5:35 PM
![]()
![]()

10 Comments:
So cute! I just might have to keep on the lookout for one to cover!
I like! and I love that ruffle-maker. Might have to invest in one :)
I love the ruffled slipcover! I'm sure your tutorial is well written, however, I wouldn't even try to follow it I would just ask you to make one for me!!!!!
A.dor.able.
I am always amazed at your enchanting projects!
Oh my goodness, Jill! That is so cute, I can totally see it in a photography studio! Wonderful job!
Get a stool at a thrift shop and I'll cover it for you:) should I bring a drop cloth with me after all????
I totally recommend it! It makes ruffles so much more fun and less stressful to make:)
Jill, you have skills! This is a darling ottoman cover. :-)
I'm hiring you for my next sewing project. LOL
Ok Jill, I've been wanting to add a small ottoman to the ugly Linda Blair chair currently at your place for you to do your magic on, and this is so so so cute!! I love it!! I cant wait to show my friend Jana in CA your ruffly ottoman slip cover!! She loves all things ruffly!!!
This turned out SO cute! I have a round ottoman that needs a slipcover. I love the idea about the snips! Thanks so much!
Post a Comment
Thank you for all the 'Fine' Comments! I enjoy them all!
Subscribe to Post Comments [Atom]
<< Home